
The Honest Tattoo Pain Chart: Placement, Preparation, and Safe Session Planning
Introduction: Beyond the Pain Chart
Every tattoo artist has seen it: a client who watched a single pain chart video, assumed the ribs would be a 10/10, and either psyched themselves out or walked in dangerously underprepared. Pain is not just about placement—it’s about your body’s state that day. This guide digs deeper than a simple color-coded diagram. We’ll cover real pain factors, how to prepare safely, and how to plan your session so you don’t end up in the ER.
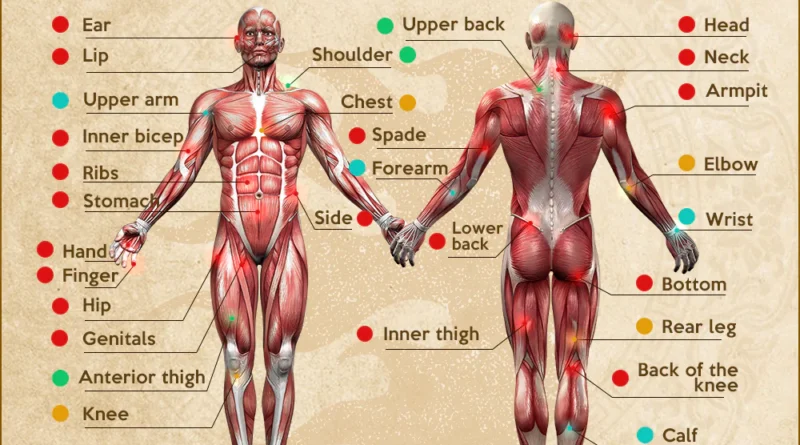
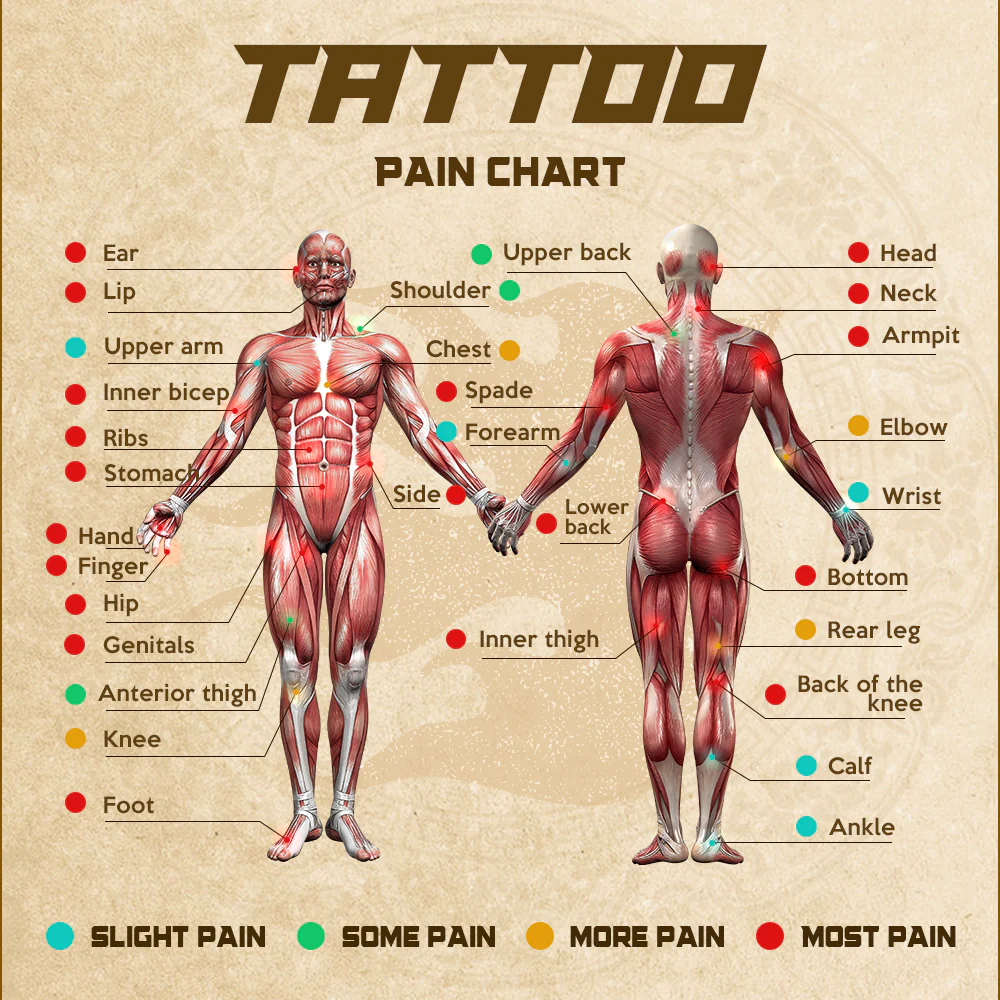
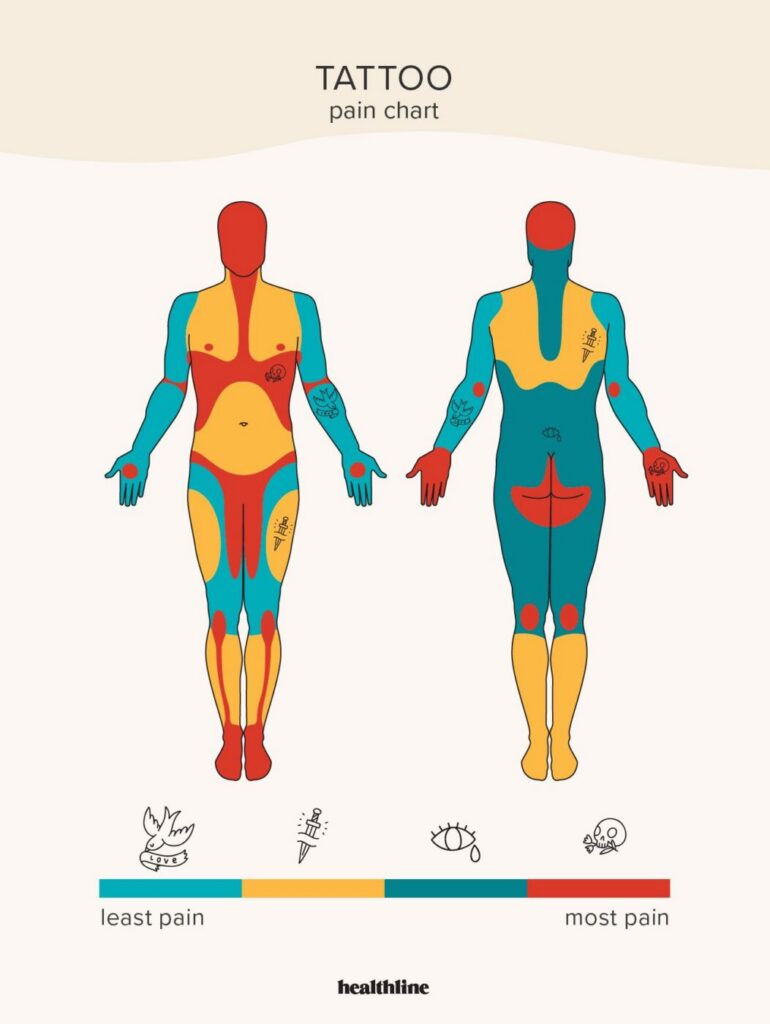
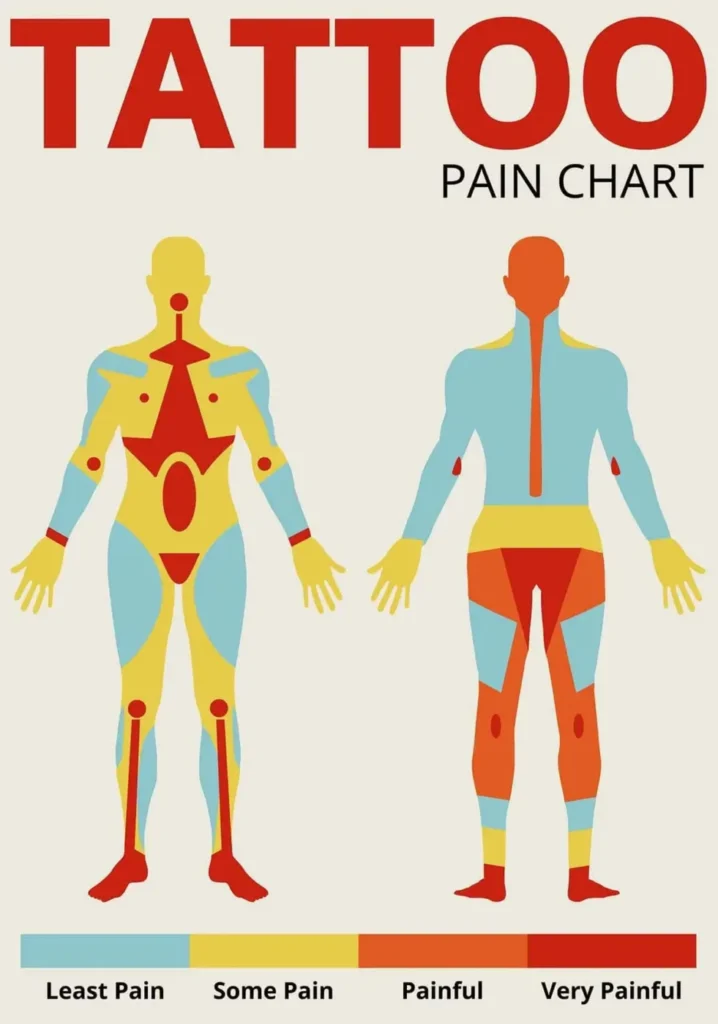
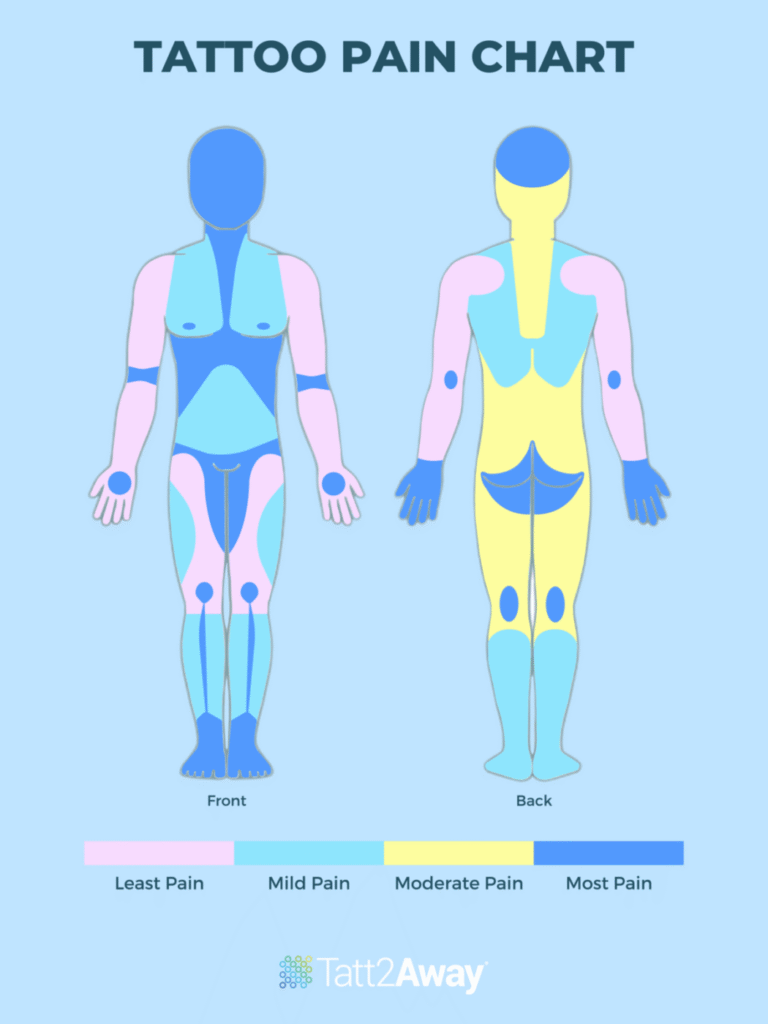
How Pain Actually Works by Placement
The Standard Pain Zones
General consensus among artists: fleshy areas (outer bicep, calf, thigh) are low pain. Bony areas (ribs, shin, collarbone, spine) are high pain. But pain is subjective. A 60kg person’s ribs will feel different from a 100kg person’s ribs. Fat and muscle cushion the needle. Skin thickness varies: the back of the knee is thin, the palm is thick but extremely sensitive.
The Surprise Pain Zones
- Elbow ditch and knee ditch: High nerve density, thin skin, constant movement. Healing is rough.
- Side of the torso (love handles): Often underestimated. The needle vibration travels through the ribcage.
- Ankle and foot: Bone close to surface, swelling common.
Pain Is Not Linear
First hour: adrenaline masks pain. Second hour: endorphins fade. Third hour: raw nerve exposure. A 3-hour rib session is not 3 hours of 10/10—it’s a curve. Plan breaks.
Preparation: What to Do (and Not Do) the Week Before

Hydration and Sleep
Your skin is an organ. Dehydrated skin takes ink poorly and hurts more. Drink 2-3 liters of water daily for 48 hours before. Sleep: 7-9 hours the night before. Sleep deprivation lowers pain tolerance by up to 30% (studies on acute pain).
Food: The Right Fuel
Eat a balanced meal 2 hours before. Protein + complex carbs: eggs, oatmeal, banana. Avoid heavy greasy food—it can cause nausea during the session. Do not skip breakfast. Low blood sugar = fainting risk.
Alcohol: Zero Tolerance
Alcohol thins blood, increases bleeding, and dehydrates you. No alcohol 24-48 hours before. Some artists require 48 hours. If you have a hangover, reschedule.
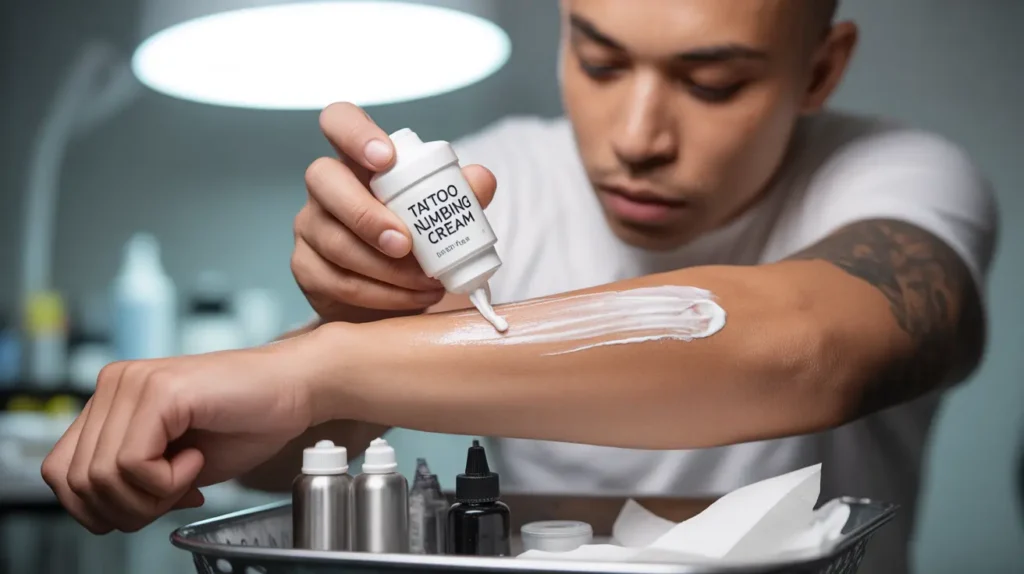
Numbing: The Caveats
What Works
Topical lidocaine creams (e.g., TKTX, Dr. Numb) can reduce pain by 30-50%. Apply 60-90 minutes before, wrap with plastic wrap. But: they change skin texture. Some artists refuse to work on numbed skin because the ink doesn’t pack as well. Always ask your artist first.
What Doesn’t Work
Spray-on numbing (like some tattoo-specific sprays) can wear off fast. Ice packs before the session? No—they constrict blood vessels and make the skin stiff. Avoid aspirin, ibuprofen, and naproxen: they thin blood. Acetaminophen (Tylenol) is safer but check with your doctor.
The Numbing Trap
Some clients over-numb and then feel sudden sharp pain when it wears off mid-session. They can’t sit still. Or they apply too much, causing chemical burns. Patch test a small area 24 hours before.
Realistic Session Planning
How Long Can You Sit?
First tattoo? Plan 2-3 hours max. Experienced? 4-5 hours is a long sitting. Back pieces often require multiple sessions. A full sleeve: 3-6 sessions of 4-6 hours each. Listen to your body. Shaking, chills, gray vision: stop.
Breaks and Communication
Schedule a 5-minute break every hour. Use it to stretch, eat a snack (sugar), hydrate. Tell your artist if you feel faint. They’d rather stop than have you pass out.
Aftercare and Safety Checks
After the session, keep the bandage on for 3-24 hours (artist’s instructions). Wash with antibacterial soap, apply thin ointment. Watch for signs of infection: spreading redness, pus, fever >101°F (38.3°C). If you see those, see a doctor. Do not use petroleum jelly or heavy creams—they trap bacteria.
FAQ
1. How much does placement affect pain?
Significantly, but it’s not the only factor. Fleshy areas hurt less, bony areas hurt more. But your pain tolerance, hydration, sleep, and stress levels matter just as much.
2. Can I take painkillers before a tattoo?
Avoid NSAIDs (ibuprofen, naproxen, aspirin) as they thin blood. Acetaminophen (paracetamol) is generally okay, but consult your doctor. Never take blood thinners.
3. Is numbing cream safe?
When used correctly, yes. But overuse can cause skin irritation or chemical burns. Always test on a small area first. Not all artists allow it.
4. What if I feel sick during the session?
Tell your artist immediately. They will stop, give you water, a snack, and let you rest. Fainting is common—don’t be embarrassed. Your safety comes first.
Conclusion
A tattoo is a controlled injury. Respect it. Prepare your body, plan your session, communicate with your artist. Pain is temporary, but a safe experience lasts a lifetime. For more on finding a reputable studio, check our verified studios directory. Need advice? Visit our consultation page.
Read more
- Magazine for more tattoo knowledge, style guides and aftercare notes.
- Request a consultation if you need help with style, placement or preparation.
- Marketplace for equipment, supplies and learning resources.
Content hub
Tattoo aftercare pillar
This article belongs to the aftercare cluster. Open the pillar page for the healing timeline, cleaning routine, moisturizing basics and warning signs.
Related reading
Continue reading
Laser Tattoo Removal Before Cover-Up: Sessions, Fading & Safety Basics
Laser tattoo removal before cover-up: how many sessions, what fading looks like, and safety rules. A professional guide…
The Cover-Up Blueprint: Planning Your Tattoo Over Old Ink, Darkness, and Size
A step-by-step guide to planning a tattoo cover-up: assessing old ink, choosing the right style, laser lightening, and…
The Ultimate First Tattoo Checklist: Design, Pain, Budget & Appointment Questions
Your first tattoo checklist: design, pain, budget, and appointment questions. Expert guide with realistic advice on styles, pain…